Makeup When Dating Over the Age of 45+. Part 2 Eye Makeup & Brows
Let’s focus on eyes and brows in part 2. Please remember that we need to embrace makeup to not only make us feel more beautiful, but there are no rules! Instead of trying to hide flaws, let’s enhance what we’ve got.
Even if you have great genes, age-related changes in our facial appearance are unavoidable. The eye area has the thinnest and most fragile skin on the entire face. We may begin to appear to have darker circles under the eye and the inner corner area. This may be due to heredity, but most often it’s due to the thinning of the skin around the eye. To make matters worse is the fact that the skin itself is falling into the hollow space of the eye socket, and that the darkness that we see is often due to the underlying veins around the eye area.
What can we do? Let’s find the right eye cream – look for anti-aging eye creams, some may even contain retinol products. Please make sure not to use your regular face products on the eyes, we need specific products in this sensitive area.
First, please do not submit to the adage: the more I use the better and faster the product will work. In the eye area, less is definitely more! The size of the amount of cream you use should be the size of a grain of uncooked rice; this will cover both eyes. When we use too much product under the eyes, it can cause milia bumps. What are milia? Milia are tiny cysts that develop due to a harmless buildup of keratin under the skin. Milia are not pimples, and attempting to pop them can cause further inflammation and scarring. You will need to see a dermatologist to remove these cysts.
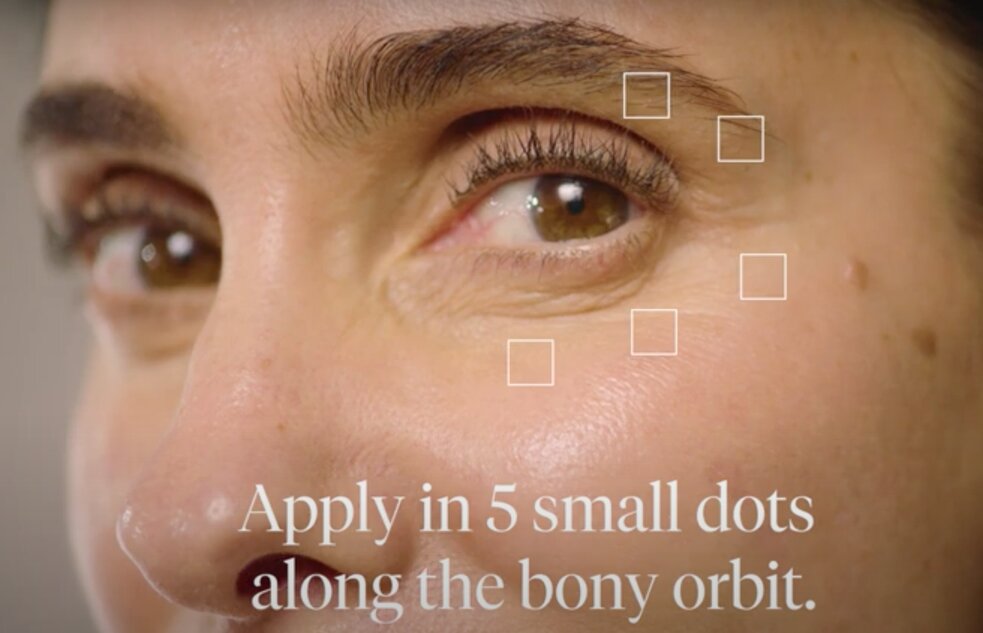
Second, how to apply the cream? Once you have your ½ grain of rice amount of cream, apply it with your ring finger. Did you know our ring fingers have less strength than all of our other fingers? This makes the perfect application for the delicate eye area. Dab 3 dots under the eye and 2 dots in between the eyelid and the brow bone. Basically, follow the orbital bone, or the eye socket, which is a set of bones that surround and protect your eye.
Next, never pull at the skin, instead gently pat the cream from the inner corner to the outer corner until it’s absorbed. You do not need to take the cream up to the upper or lower lash line. The action of blinking and the heat that is created from this motion will disperse the eye cream where it is needed.
Did you know that scientists have shown that the average person blinks 15-20 times per minute. That’s up to 1,200 times per hour and a whopping 28.800 times in a day. Think about this, that is why our eye makeup products tend to feel like they are melting away. The eye area is the hottest area of our face as it’s getting a huge workout daily without us even thinking about it.
Let’s talk now about eyebrows and eyelashes. We all want beautiful, luscious brows and lashes, but unfortunately as we age, the growing process slows and our hair starts to thin and grow sparse. The hairs in the eye area are like the hair on our head, they grow, shed, and regrow. Our brows differ from our lashes in that the process of shedding and regrowth takes place every 4 months, our lashes take 3 months.
I use both a lash serum and a brow serum to help replenish some sparse areas that I have. Please make sure that you are using 2 different products to match the rate of hair growth. I learned the hard way that a lash serum will accelerate the process if used on the brows, and my brows started shedding – I could see this happening.
You may now be thinking, what about my eyebrows? The answer is this: First, never apply a brow pencil or powder that is darker than your hair color – instant aging. Our hair is usually never one shade, it’s usually about 2-5 shades of hairs. Think about your brow product being one of the lighter shades of your hair. You can also use 2 colors in your brows, the lightest color going on the inner parts of your brow (towards the nose) and 1 shade darker towards the tail end.
My best tip is to only use brow pencils or powders to fill in any sparse areas and follow the shape of the way your hairs normally grow. Another tip that gives us the look of an eye lift is to not put product underneath the brow. Instead, take the pencil from the highest point of the arch and fill if needed from above.
You may be asking me, what do I do with any gray hairs in my brows? Try not to pull them out, instead use a colored or tinted brow gel. This will help camouflage the gray color, as a brow gel is like a colored mascara. The brow gel will also hold your brows in place – like a hairspray for the eyebrows.
Keeping the brow color dark and pointed will have anyone looking like Cruella Deville – not the look we want…unless it’s Halloween.
Let’s move on to eye makeup application now. Don’t ever let anyone tell you that over the age of 45 you should never put shimmer on your eyes. The rules are simple here – apply it regularly only on the upper and even on the lower eyelid above/below the iris and into the inner corner of your eye. This helps to draw attention to the color of your eye.
Matte eyeshadows should be used on the brow bone, socket area, and the outer corner of the eye. This will help “push” the area where you may be hooded back, giving you a beautiful eye. And for goodness sake, stop with the black eyeliner on the lower lid. This will not only age you, but it will draw your date’s eye down to the lower lid…not your beautiful baby blue, green or brown eyes.
Please never put shimmer eyeshadows under the brow bone. Other than the nose, the brow bone is usually the feature on our face that is most forward – think of Cro Magnon. By applying shimmer eyeshadows under the brow bone, you are pushing that area even further out and this will age us about 10-15 years.
Let’s finally talk about the elephant in the room…what to do with dark under eye circles. First of all, do not put concealer that is 2-3 shades lighter than your skin under the eyes. Why? This only makes the darkness under the eye look gray, but it will not match your skin. Have you noticed any tiny “spider” like veins? They are most often blue or purple in color.
What should you do? Color correct the dark circles, i.e. veins. If your veins under your eye look blue, a salmon or orange color corrector will work wonders. However, if the veins under your eye are more purple (which mine are), a yellow or olive color corrector works best.
Apply very thin layers of color corrector only on the areas where this color shows through and pat gently into the skin. This often takes care of the darkness immediately and no concealer will need to be applied. The areas you have color corrected will need to be set with a tiny – yes I said a small amount of powder (under eye powder is usually more finely milled and works great in this area).
Now if the hollows from the orbital bone are coming through, you can add a concealer that is 1-2 shades lighter than your foundation. Please make sure you are only applying this color only to the area that looks hollowed out, do not put this everywhere. Light colors push things forward and this will help give the appearance of the hollow being pushed out.
Never put too much concealer around the crow’s feet area of the eyes. The concealer just gets caught in the fine lines and will appear to make you look older than you are. If you want to lift the outer corner of your eye, apply a teeny, tiny amount of the color you used on the hollows just at the outer edge and press into the skin lightly with your ring finger.
I hope this helps you out by feeling more confident, whether you are beginning a new journey of dating after 45, or just some tips to help as we all age.
I offer several product suggestions in my Shop My Shelf page.

How to feel confident in your makeup when you begin dating after the age of 45+
Part 1 Contour, Blush & Highlight
In today’s world of Instagram & Pinterest (where many go to look for makeup inspiration), how are we able to compare ourselves to photos that are photoshopped & highly filtered? These social media stars usually are using strong lighting so that they are able to give their face a “full beat” by wearing a ton of makeup
In real life, we can’t walk around with an Instagram filter! Others need to see us as we are…flaws and all, that is who we are.
I can share with you that at the age of 45, I was thrown back into the dating world after being married for 26 years. Not only is dating very different from when I was younger, but the way I thought about myself was totally different.
As we age, many things about our face begins to change. First, we begin to lose volume in our face, our cheeks are not as high as they used to be. What can we do? Change the way we wear our blush, contour & highlight.
Please do not wear the same amount of contour as you did in your 20’s! The color we use for contour is not meant to be orange like a bronzer. If you look at a tree in the early morning or late day and see a shadow – look closer. That shadow is a gray tone, not orange. Stop using bronzers and use a cool tone gray product. The skeleton look of bringing your contour in towards the lip will age you by about 15-20 years. A good rule of thumb is to stop your contour at the outer edge of your iris (the colored part of the eye), when looking straight into a mirror.
I love using a couple products for the correct contour color: Kevyn Aucoin The Sculping Contour Powder and Senna Cosmetics Face Sculpting Palette. These products come in 2-3 shades for all skin tones. My favorite is the Face Sculpting Palette by Senna. It is a cream to powder product for easy application and makes blending really easy.
Let’s talk about blush placement – stop smiling when putting your blush on the apples of your cheeks! As we age the volume (or fat) in our cheeks starts to drop. Do a test: put your finger or a bright blush color on your apple and smile. Now stop smiling, what happened? Your finger or the bright blush color has dropped quite a bit.
What is the proper placement of blush? Keep it high and don’t come all the way in any further than the inner corner of the pupid (black center of the eye) and no lower than the base of your nose. What do I mean by high? Place your blush towards the top of your cheek bone, bring it up towards the top of your ear and again no further towards the nose than the inside corner of your pupil. Also make sure to blend, blend, blend – it should look like a watercolor and the edges should fade away to nothing.
Please, no shimmer blush if you have acne or acne scarring, large pores, fine lines or your skin is dehydrated. A flush is a pixilation of color showing through the skin and your blush should be reflective of a flush.
As we get older, I find that a cream blush or even a bit of lipstick (a cream product) tends to work much better than powder. Some of my favorite cream blush products are: Senna Cosmetics Cheeky Blush Cream to Powder. It goes on as a cream for smooth payoff and easy blending. Then it sets as a long wear powder with a dewy look. I also like Ilia Multi-Stick and Color Haze.
Now, let’s talk about highlighters…we need to stop glowing and shimmering like a disco ball! And please, stop putting highlighter on the tip of your nose! The nose is the one feature on the face that sticks out further than anything else. The purpose of a highlighter is to bring features forward – not to look like Rudolph.
Where do you use a highlighter and how shimmery should it be? Highlighters can be used on the highest part of the cheekbone, the bridge of the nose and the cupid’s bow on the top of your lips. How much shimmer to use? Use something more with a soft glow, not chunks of glitter.
For application highlighter is to be used on the highest part of your cheeks, do not come close to the outer edge of the eye. This will only enhance your smile lines and that’s not a good look. Again, do not bring the highlighter past the outer edge of your iris. When placing on the nose – only the bridge…do not place it between your eyes or the tip of your nose. Keep a light touch, only apply a little bit of product.
My favorite highlighters are: LimeLife by Alcone Blush in shade 06 Glowing, and LimeLife by Alcone Perfect Glow Drops mixed with a drop of Dew Date Facial Oil.
Please remember…on your date just be yourself. With the tips I’m sharing, you will look beautiful, confident and let your beauty shine!
Stay tuned for 3 more blog posts with topics including eyes & brows, lips, and complexion.
If you click this link you can find many of the products I mentioned here in this blog post.
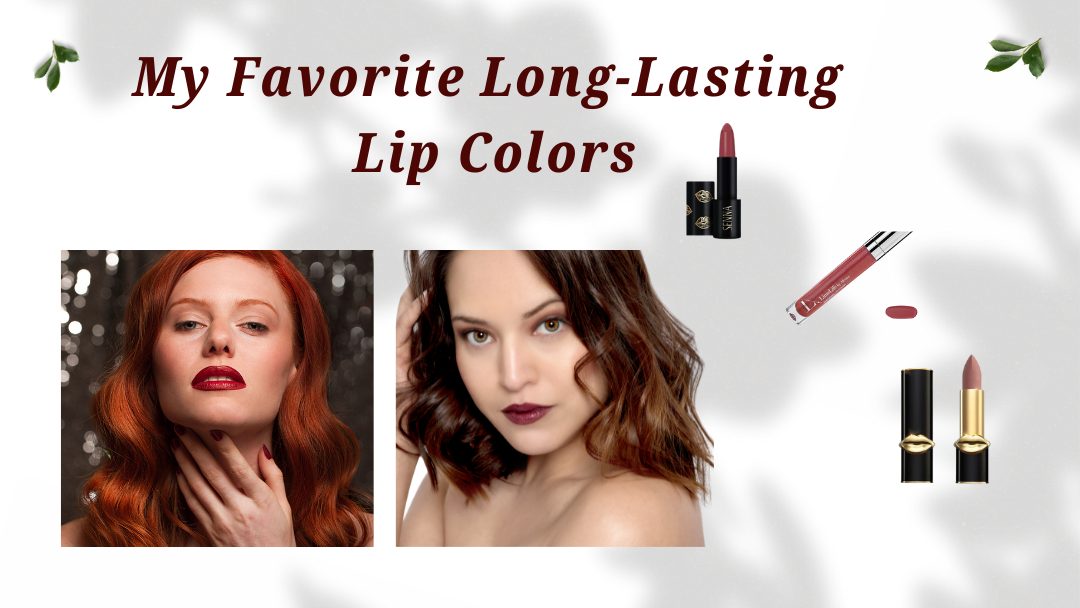
How to Choose the Right Long Wear Lipstick
How many of you have tried wearing long wear lip color, but found it uncomfortable? I’m here to help you navigate through the process of trial and error that I have personally experienced.
The biggest tip I have for you is to begin the evening before you plan to wear a lip color that lasts for hours. Begin by exfoliating your lips with a lip scrub, take a very small amount, rub it in, work it in with your lips and then tissue it off (I love LimeLife Perfect Lip Scrub). The next step is to moisturize with a lip mask. I always apply a lip mask before bed and sleep with it on – your lips will thank you the next morning. (My favorite is Sara Happ The Dream Slip Overnight Lip Mask).
Now, when you wake up the next morning, your lips will feel fully nourished and you can begin the next step. While you take your morning shower and after you’ve brushed your teeth, put on a lip balm to keep your lips conditioned. When you have finished showering and moisturizing your face and body, take a tissue and wipe off that lip balm.
I like to begin the lip color process with a lip liner, choose one that has a medium to full pigment for a long lasting, transfer-proof finish – this will prevent lip color from feathering or bleeding into any fine lines around the lip. I will begin by drawing the outline (and cheat a bit by making my upper lip look fuller), then lightly fill in the lips with the liner.
Now for the big guns – your long wear lip color. Choose wisely! Over the years, I have tried many brands.
- My least favorite are: Lip Ink, Senegence and Maybelline Matte Ink.
- Runners up to the winners include Stila Stay All Day Liquid Lip and AJ Crimson S+M Sultry Matte.
- My absolute favorites are LimeLife by Alcone Enduring Lip Color, Pat McGrath Matte Trance Lipstick and Senna Cosmetics Matte Fixation Lipstick.
So what’s the difference? My least favorite category is really difficult to remove! I have tried their removers, olive oil, and even my favorite waterproof makeup remover and some of the lip color still did not budge. I know why they sell lip moisturizer and gloss with their products – because they are super uncomfortable to wear!
The runners up category last a super long time, but need a bit more finesse with the waterproof makeup remover before the lips become clean.
My absolute favorite category is that for 2 reasons. First, they are comfortable to wear – my lips do not feel super dry and dehydrated. Second, they all have ingredients like great skin soothing oils such as squalane & moringa oil to name a couple as well as silicas for a smooth glide onto the lips.
What is my best advice for easy removal of these long wearing lip colors? My favorite waterproof makeup remover is by LimeLife by Alcone – Makeup Remover Spray. It’s easily sprayed onto the lips or onto a cotton pad, let it sit for about 10 seconds and swipe away.
If you want to know where to purchase these products, please visit Shop My Shelf where I have put together my favorite products and you can shop right from this page.